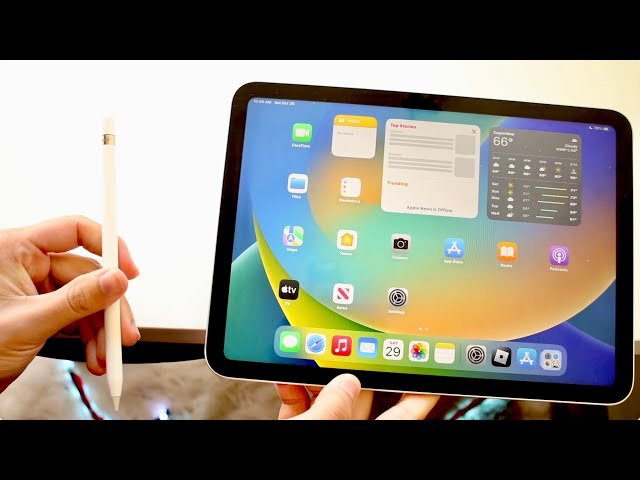
In the realm of digital creativity and productivity, the Apple Pencil has emerged as a quintessential accessory for iPad users. Whether you’re a seasoned artist, a diligent note-taker, or someone who enjoys the seamless navigation it provides, knowing how to connect the Apple Pencil to your iPad is the first step toward unlocking a world of possibilities. This comprehensive guide will walk you through the steps and provide insights into ensuring your Apple Pencil is ready to transform your iPad experience.
Understanding Compatibility
Before diving into the connection process, it’s crucial to ensure that your Apple Pencil is compatible with your iPad model. Apple offers two versions of its stylus: the first-generation Apple Pencil and the second-generation Apple Pencil. The first-generation pencil is compatible with older iPad models, including the iPad (6th, 7th, and 8th generations), iPad Air (3rd generation), iPad mini (5th generation), and all iPad Pro models up to 2017 (10.5-inch, 12.9-inch, and 9.7-inch). The second-generation Apple Pencil, on the other hand, works with the newer iPad Pro models (11-inch and 12.9-inch from 2018 onwards) and the latest iPad Air and iPad mini versions.
Connecting the First-Generation Apple Pencil
Connecting a first-generation Apple Pencil to your iPad is a straightforward process. Start by removing the cap on the end of the Apple Pencil to reveal the Lightning connector. Insert this connector into the Lightning port at the bottom of your iPad. A pairing request will appear on your iPad’s screen; tap “Pair” to complete the connection process. It’s essential to ensure that both your iPad and Apple Pencil are sufficiently charged before attempting to pair them. This initial connection also serves as a charging session for your Apple Pencil, so if it’s your first time using it, keep it connected for a little while to ensure it has enough power.
Pairing the Second-Generation Apple Pencil
For those with the second-generation Apple Pencil, the connection process is even more seamless, thanks to its design that supports magnetic attachment and wireless charging. Simply attach your Apple Pencil to the magnetic connector on the side of your compatible iPad—the flat side of the pencil will automatically align with the magnetic connector. Once attached, a brief animation on the iPad screen will confirm the connection, and a “Pair” button will appear. Tap it to finalize the pairing. This method not only pairs your Apple Pencil with your iPad but also begins charging it if needed.
Troubleshooting Connection Issues
Occasionally, you might encounter issues when attempting to connect your Apple Pencil to your iPad. If this happens, there are several troubleshooting steps you can take. First, ensure that your iPad’s Bluetooth is turned on, as it’s required for the connection. If you’re using a first-generation Apple Pencil, check the Lightning connector for any debris or damage that might prevent a proper connection. For second-generation Apple Pencil users, make sure the magnetic connector on the iPad and the pencil’s flat side are clean and free from any obstructions.
If the Apple Pencil still won’t connect, try restarting your iPad and attempting the pairing process again. For persistent issues, especially if the Apple Pencil or iPad fails to recognize each other repeatedly, it might be necessary to reset your network settings. This can be done through the iPad’s settings menu but note that it will also erase all saved Wi-Fi passwords and Bluetooth connections, so use it as a last resort.
Maximizing Your Apple Pencil Experience
After successfully connecting your Apple Pencil to your iPad, the door to an expansive world of functionality opens. From taking handwritten notes that can be converted into text, to creating detailed artwork with pressure-sensitive precision, the Apple Pencil elevates the iPad experience significantly. Many apps have been optimized for Apple Pencil use, offering features like tilt sensitivity, pressure response, and palm rejection for a natural writing and drawing experience.
To fully benefit from your Apple Pencil, explore the variety of settings available on your iPad. You can adjust the pencil’s behavior in the “Apple Pencil” settings menu, such as toggling the “Scribble” feature, which allows you to write in any text field with the pencil, and your iPad will convert it into typed text. Additionally, familiarizing yourself with gesture controls available on the second-generation Apple Pencil, like double-tapping to switch tools in supported apps, can further enhance your productivity and creativity.
Conclusion
Connecting an Apple Pencil to your iPad is a simple process that unlocks a vast array of features and capabilities, enhancing your productivity, creativity, and overall user experience. Whether you’re using the first-generation pencil with an older iPad model or the latest second-generation pencil with a newer iPad, the steps outlined in this guide will help you establish a seamless connection. Remember to check for compatibility, follow the appropriate pairing instructions, and explore the Apple Pencil’s features to make the most out of your iPad experience. With your Apple Pencil connected, your iPad becomes an even more powerful tool for work, creativity, and everything in between.

