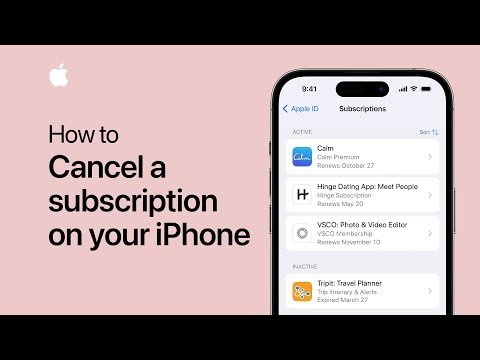
In an era where the majority of services offer subscription-based access, managing these subscriptions becomes crucial for users, especially iPhone users, who often juggle multiple subscriptions across various apps and services. Understanding how to cancel subscriptions on your iPhone can help you take control of your monthly expenses and avoid paying for services you no longer use or need. This comprehensive guide aims to provide you with step-by-step instructions on how to cancel subscriptions directly from your iPhone, ensuring that you can manage your digital life more effectively and economically.
Understanding iPhone Subscriptions
Before diving into the cancellation process, it’s important to grasp what subscriptions are and how they work on your iPhone. Subscriptions on iPhone are recurring payments tied to specific apps or services that you’ve agreed to pay for on a regular basis, such as monthly or yearly. These can range from streaming services like Netflix or Spotify to productivity tools or even fitness apps. Subscriptions are linked to your Apple ID, allowing you to access the subscribed service across all your Apple devices seamlessly.
Locating Your Subscriptions
The first step in canceling a subscription on your iPhone is locating the subscriptions list within your device settings. Apple has made this process relatively straightforward to ensure users can easily manage their subscriptions. Here’s how to find the list:
- Open the Settings app on your iPhone.
- Tap on your name at the top, which leads you to your Apple ID settings.
- Select “Subscriptions.” This will open a list of all active and expired subscriptions tied to your Apple ID.
Canceling Subscriptions on iPhone
Once you’ve located your subscriptions, canceling them is just a few taps away. Follow these steps to cancel any active subscription on your iPhone:
- In the Subscriptions menu, browse through the list to find the subscription you wish to cancel.
- Tap on the subscription you want to cancel. This will open the subscription’s details.
- Look for the “Cancel Subscription” option. If you’re within a trial period, it might say “Cancel Free Trial” instead.
- Tap on “Cancel Subscription” or “Cancel Free Trial.” You’ll receive a prompt asking you to confirm your decision to cancel.
- Confirm your choice. After confirmation, your subscription will be set to expire at the end of the current billing cycle.
It’s important to note that deleting the app associated with a subscription does not cancel the subscription. You must follow the above steps to ensure that you’re not billed in the future.
Understanding the Implications of Cancellation
When you cancel a subscription, you retain access to the subscribed service until the end of the current billing period. This means that if you’ve paid for a month and cancel midway, you’ll still have access for the remainder of the month but won’t be charged for the subsequent period.
Troubleshooting Common Issues
Subscription Not Listed
If you can’t find a subscription in your list, there are a few possible explanations. It could be under a different Apple ID, so ensure you’re logged into the correct account. Alternatively, the subscription might be directly through the service provider and not through Apple, in which case you’ll need to cancel it through the provider’s website or customer service.
Unable to Access Subscriptions
If you’re having trouble accessing your subscriptions list, ensure your device is running the latest version of iOS. If the issue persists, restarting your device or signing out and back into your Apple ID may resolve the problem.
Conclusion
Managing subscriptions on your iPhone is a vital part of maintaining your digital and financial wellbeing. By following the steps outlined in this guide, you can easily cancel any unwanted subscriptions, ensuring that you only pay for the services you use and value. Remember to regularly review your subscriptions to keep your expenses in check and to make informed decisions about the services you choose to invest in.

